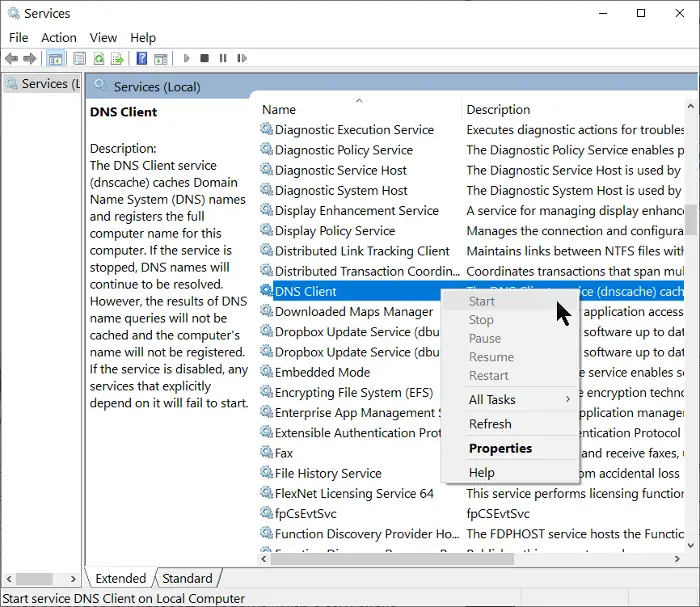
The Windows system lets you start and stop the DNS Client service at will, and the most straightforward place to do this is in the Services applet. First, we’ll show you how to start or stop the DNS Client service in the Services applet.
How to Start or Stop the DNS Client service
The above steps are standard for starting the DNS client service. However, many users have found that the options to start or stop the DNS Client service don’t work in their system. This article shows you three ways to fix this issue and start or stop the DNS Client service if the options are greyed out.
Enable DNS Client Service if greyed out or disabled
If the DNS Client Service if greyed out or disabled on your Windows 11/10 computer, then know that it could be bu design. Nevertheless, here are ways you can try for enabling the start and stop options for the DNS Client service. Continue reading below for the full guides for carrying out the above operations.
1] Fix it from the Windows Registry Editor
Click on the Start menu button and search for regedit. Right-click on Registry Editor and select the option to Run as administrator. In the Registry Editor, navigate to the following folder: Right-click on the Start key on the right-hand side and select Modify. Change the value data to 4. Hit the OK button to save this setting. NOTE: Changing the value data to 4 means that you’re disabling the service. To set it to start the service automatically. Likewise, 3 means it starts manually. Close the Registry Editor and follow the steps in the previous section to start the DNS client service from services.msc.
2] Start the DNS client service from the System Configuration applet
Open the Run dialog box using the Windows key + R combination. Input MSConfig in the Run dialog box and click on the OK button. Switch to the Services tab and find the DNS client option from the list. Enable the DNS client service by marking the checkbox to the left of the service. If you wish to disable or stop the service, unmark the checkbox next to it.
3] Start the DNS client service from Command Prompt
The Command Prompt gives you the ability to make numerous changes to your Windows system. These include changes that are impossible to make with other programs. Here is how to start and stop the DNS client service using the Command Prompt: Press the Windows key and search for cmd. Right-click on Command Prompt and choose the Run as administrator option. Type in the following command in the Command Prompt window and hit ENTER: The above command forces the DNS client service to stop if it was running. Next, type in the following command in the Command Prompt window and hit ENTER: This command starts the DNS client service if it was turned off and not running. The three solutions preferred here will help you start or stop the DNS client service, whether it’s greyed out or not.