How to Change Video Playback Speed on Windows Media Player
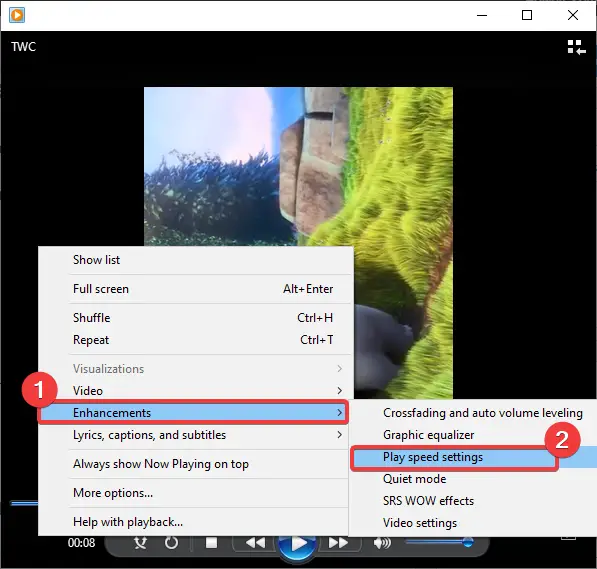
Here are the main steps involved in order to change video playback speed in Windows Media Player: Have a look at these steps in detail now! Simply launch the Windows Media Player application on your PC and then import a video and play it. Or, play a video from the existing library. Now, right-click on the video you are playing, and from the context menu, go to the Enhancement option. After that, tap on the Play speed settings option.
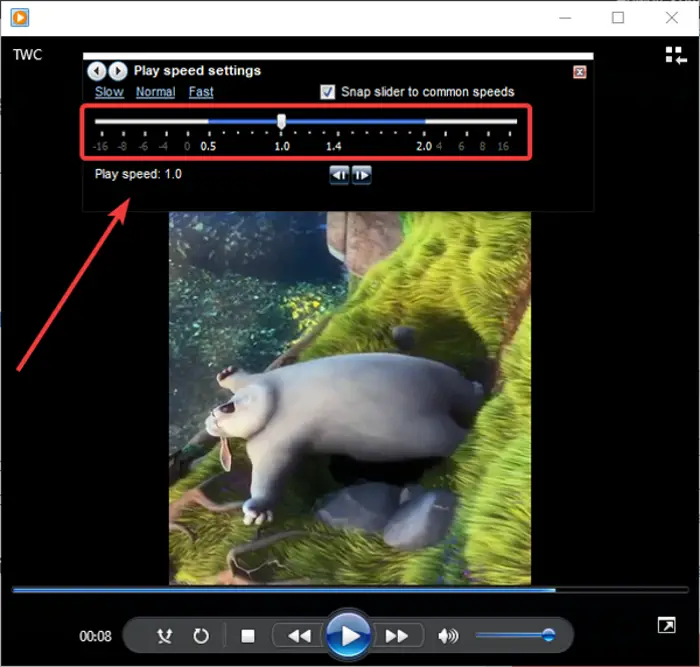
As you click on the above option, you will see a dock window above the playing video called Play speed settings. In this window, you get a Play Speed slider. You need to adjust this play speed slider based on how much you want to change the video playback speed. If you want to slow down the playback speed of the video, drag the slider towards the left, below 1.0 speed. To speed up a video, simply drag the speed slider towards the right, above 1.0 speed. You can increase or decrease the playback speed of a video by 16 times of the original speed.
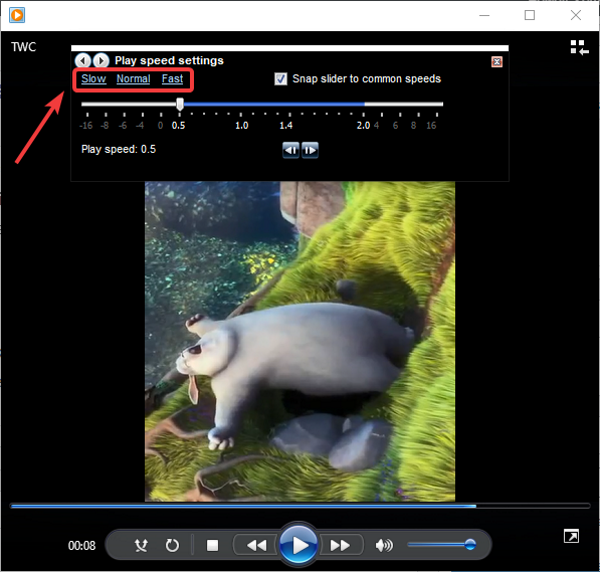
You can also quickly slow down or speed up video speed by clicking on the Slow or Fast button present in the playback settings window. If you want to quickly go back to the original playback speed, tap on the Normal button and you will see the video playing at normal speed.
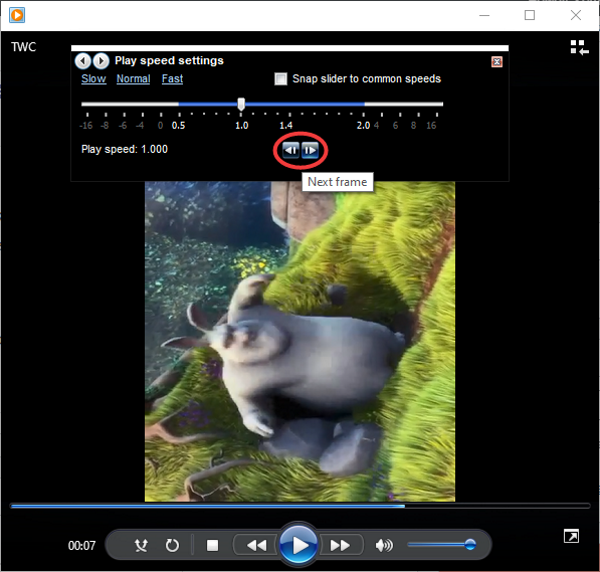
You can disable the Snap slider to common speeds if you want to accurately change the video playback speed, as exact as required. Furthermore, you can also play and view each video frame by using the Next Frame or Previous Frame button.
So, this is how you can easily change video playback speed in Windows Media Player and watch your videos in slow motion or fast motion. Now read:
Increase Video Streaming speed on Windows Media PlayerVideo Speed Controller for Mozilla Firefox and Google Chrome


